
Table of Contents
ToggleThe Goblin Hut has always been one of Clash Royale’s most divisive cards. Some players swear by its swarm potential, while others dismiss it as bait for spell-heavy opponents. But in 2026, with the meta shifting toward mid-ladder gameplay and the rise of single-target defenses, the Goblin Hut deserves a second look. This isn’t about making the Hut meta-defining, it’s about understanding when it works, how to protect it, and which deck archetypes can genuinely leverage its spawning goblins for value. Whether you’re climbing the ladder or refining your deck after the latest balance patch, this guide breaks down the card from stats to strategy, with specific placements, synergies, and common traps to avoid.
Key Takeaways
- The Goblin Hut spawns approximately 15 goblins over 60 seconds for just 4 elixir, making it an efficient spawning utility card that requires strong supporting threats to maximize value.
- Optimal Goblin Hut placement depends on timing—deploy it only when you have an elixir advantage or full hand to avoid being vulnerable to immediate counter-pushes.
- Fireball is the primary counter to Goblin Hut, so successful Goblin Hut decks must include secondary win conditions like Hog Rider or spell chip damage to prevent single-spell losses.
- The Goblin Hut excels in mid-ladder (4,000–6,500 trophies) beatdown and control decks but struggles in high-ladder and tournament play where opponents have consistent spell rotations and dedicated counters.
- Avoid common mistakes like building your entire offense around only the Goblin Hut, placing it defensively against aggressive decks, or deploying it without tracking opponent spell cycles.
- Treat Goblin Hut as a supporting utility card that generates passive pressure and synergizes with swarm mechanics, not as a primary win condition for climbing ladder.
What Is The Goblin Hut Card?
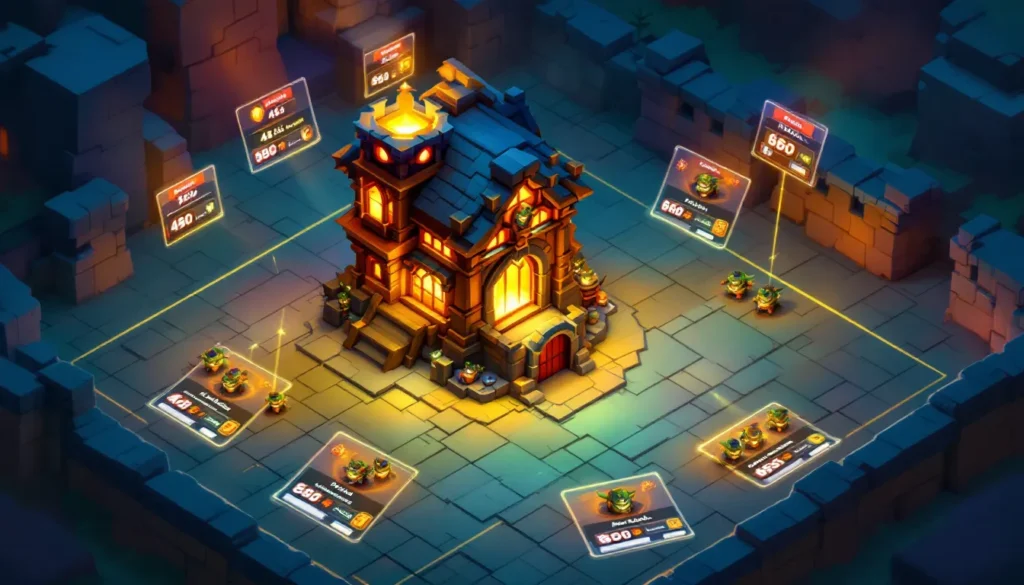
The Goblin Hut is a building card that spawns goblins over time, making it a cornerstone of swarm-focused strategies. Understanding its mechanics is essential before throwing it into your deck.
Card Stats and Deployment Overview
The Goblin Hut costs 4 elixir and deploys as a stationary building on the arena. Current stats (as of Season 85) show it has 960 hit points at tournament standard, making it moderately tanky but not immune to fireball-tier spells. The building lasts 60 seconds once placed, during which it continuously spawns Goblins, small, fast melee units with 29 health each at tournament level.
The Hut spawns a new goblin roughly every 4 seconds, meaning you’ll typically get 15 goblins throughout its full lifetime. Each goblin deals 48 damage per hit and moves at medium speed. This isn’t explosive damage in isolation, it’s a slow, relentless pressure tool. The building itself doesn’t attack: it only spawns troops. That distinction matters because defensive buildings like Cannon or Tesla actively defend your tower. The Hut requires offensive pressure elsewhere in your deck to work.
Elixir efficiency is the key metric here. You invest 4 elixir upfront, and the Hut generates value through spawned units over time. If your opponent ignores it, 15 goblins will chip your tower or distract their defenses. If they answer it immediately with a spell like Fireball (4 elixir), you’ve traded elixir but only temporary board presence. The real value emerges when the Hut’s goblins work in concert with your other cards.
How The Spawning Mechanic Works
The spawning timer is crucial. The Goblin Hut spawns its first goblin approximately 4 seconds after placement. From that point, new goblins emerge every 4 seconds until the building dies or expires. This means:
- Early spawns (0-10 seconds): You get 2-3 goblins while your supporting troops move forward. These early units can bait spell usage or tank chip damage.
- Mid-duration (10-40 seconds): The bulk of the Hut’s value window. 8-10 goblins are active on the board, creating sufficient pressure.
- Late-game spawns (40-60 seconds): The building winds down, but the last spawns can still pose problems for your opponent if they’ve exhausted defenses.
One often-overlooked detail: the Hut’s goblins spawn in waves, not individually. When the spawn timer triggers, one goblin appears. This predictability lets experienced players anticipate when the next unit arrives and plan their defensive responses accordingly.
Destroying the Hut early prevents future spawns immediately. So a well-timed Fireball, Poison, or even Inferno Dragon on the Hut stops the entire spawning sequence, this is why supporting your Hut with other threats is mandatory.
Best Deck Combinations With Goblin Hut
The Goblin Hut doesn’t carry decks alone. Its strength emerges when paired with complementary cards that amplify its swarm potential or create distraction layers. Here are the primary archetypes that work.
Aggressive Beatdown Decks
Beatdown decks use tanky troops and high-damage support to break through enemy defense. The Goblin Hut fits because its spawned goblins create a secondary offensive front while your main push develops.
Example archetype: Hog Rider + Goblin Hut
- Hog Rider (4 elixir): Your primary tank and damage dealer. It charges straight to the tower, forcing defensive commitments.
- Goblin Hut (4 elixir): Deployed behind the Hog or in a separate lane, the spawned goblins occupy defenses while Hog deals tower damage.
- Fireball (4 elixir): Your air/swarm answer and cycle card. Clears grouped defenses.
- Zap (2 elixir): Stun utility and spell cycle.
- Musketeer (4 elixir): Air counter and ranged support.
- Guards (3 elixir): Melee deflection and push support.
- Archers (3 elixir): Ranged chip and air defense.
- Skeletons (1 elixir): Cheap filler and cycle.
This deck pressures both lanes simultaneously. The Hog demands immediate attention (typically drawing guards, mini pekka, or other tanky counters), while the Goblin Hut’s spawned units create alternate pressure. Opponents stretched between two threats often make suboptimal defensive choices.
Another viable variant replaces the Hog Rider with the Hog Rider Clash Royale:, swapping for a different primary win condition. But the principle remains: pair spawning goblins with a separate high-pressure threat.
Control and Chip Damage Decks
Control decks prioritize surviving until late-game, then exploiting elixir advantages. The Goblin Hut shines here because it generates value passively while you defend and cycle.
Example archetype: Goblin Hut + Fireball Cycle
- Goblin Hut (4 elixir): Your value generator and chip threat.
- Fireball (4 elixir): Clears air swarms and damages towers. Spell cycle staple.
- Poison (4 elixir): Area denial and chip support.
- Cannon (3 elixir): Building counter and cheap defense.
- Musketeer (4 elixir): Reliable ranged unit.
- Ice Wizard (3 elixir): Slow utility and crowd control.
- Bats (2 elixir): Air defense and chip.
- Log (2 elixir): Ground swarm counter and tower chip.
This deck’s strength lies in spell efficiency. You defend with cheap buildings and ranged units, then use Fireball and Poison to clear grouped threats while also damaging the opponent’s tower. The Goblin Hut provides constant low-level pressure, if your opponent doesn’t address it immediately, those 15 goblins accumulate ~1,000+ tower damage over 60 seconds. In control mirrors where both players are trading evenly, that passive damage often becomes the tiebreaker.
The Clash Royale Firecracker: Unleash Her Power for Dominating Strategies also slots well into this archetype for air defense and additional chip damage.
Swarm-Based Synergy Decks
These decks double down on swarm mechanics, using cards that synergize with unit counts and spawn timings.
Example archetype: Goblin Hut + Skeleton Army Swarm
- Goblin Hut (4 elixir): Primary spawner.
- Skeleton Army (3 elixir): Secondary swarm unit. Works as a distraction.
- Barbarian Hut (5 elixir): Summons barbarians, amplifying the swarm layer.
- Mirror (variable): Duplicates your highest-elixir card, often Hut or Barbarian Hut for massive swarm pressure.
- Clone (3 elixir): Duplicates nearby troops, turning your swarm into a doubled threat.
- Tornado (3 elixir): Pulls units together, protecting your swarm or grouping enemy defenses for Fireball.
- Zap (2 elixir): Resets swarm counters and stuns.
- Firecracker (3 elixir): Ranged support with knockback synergy.
Swarm decks are high-risk, high-reward. Facing spell-heavy opponents (Fireball, Poison, Rocket, Earthquake) means your units evaporate. But against single-target-focused defenses (Inferno Dragon, Mini Pekka, Executioner), swarms overwhelm through sheer numbers. The Goblin Hut works here because it’s a building, spells answer buildings differently than troops, giving you mana efficiency if your opponent commits a spell to the Hut while your other units advance.
Note: The Clash Royale Double Evolution represents a more advanced variant combining spawning mechanics with evolution cards, though that archetype sits outside the Goblin Hut’s current meta.
Placement and Positioning Strategies
Where you deploy the Goblin Hut determines whether it becomes a value engine or a wasteful elixir sink. Placement timing and lane choice are equally critical.
Optimal Lane Placement
The Goblin Hut is a building, so it cannot be placed directly in front of your king tower (the center), it must deploy to either your left or right lane. Your choice determines offensive and defensive implications.
Offensive lane placement (near opponent’s tower):
Placing the Goblin Hut closer to your opponent’s side of the arena (but within your territory) maximizes offensive value. The goblins spawn closer to the enemy tower, meaning shorter travel time and faster chip damage.
- Pros: Goblins begin damaging the tower sooner. The building itself is a forward threat, forcing your opponent to rotate defenses or risk tower damage.
- Cons: The Hut sits farther from your main defenses. If your opponent plays an aggressive unit (Hog Rider, P.E.K.K.A., or Lava Hound), they’re also closer to your tower.
Defensive lane placement (near your tower):
Placing the Hut closer to your tower prioritizes spawning protection and defensive stalling.
- Pros: Goblins emerge directly in front of defending units, creating interference and forcing opponents to deal with clutter. The Hut is harder to ignore because it’s closer to your tower.
- Cons: Longer travel time means goblins reach the opponent’s tower later. Less aggressive in nature.
The timing factor: Placement timing matters as much as position. Deploy the Goblin Hut when:
- You have defensive control (opponent recently spent elixir).
- You’re about to deploy a complementary push (Hog Rider, Beatdown troop, or spell support).
- Your elixir is full or near full, reducing the risk of being out-tempo’d if your opponent punishes the placement with a fast push.
Deploy the Hut into an active push or after your opponent commits heavy elixir and you’re confident in your defenses.
Timing Your Deployment
Elix timing dictates Goblin Hut effectiveness. Placing it at the wrong elixir moment can leave you vulnerable to immediate counter-attacks.
Early game (first 60 seconds):
Deploying the Goblin Hut early reveals your archetype but establishes chip damage momentum. If you play it at 3:50 (first 10 seconds), you’re signaling a spawning-heavy deck. Experienced opponents will either:
- Answer immediately with a spell (Fireball or Poison), denying further value.
- Ignore it and apply pressure elsewhere, testing your defensive depth.
Early placement works if your deck includes reliable defenses and you’re comfortable surviving the opponent’s follow-up. It doesn’t work if you lack air defense or tanky units.
Mid-game (90-120 seconds):
This is the sweet spot. You’ve built an elixir advantage, the opponent has cycled enough cards that you can read their defensive options, and you can immediately support the Hut with a push or defensive backing. Mid-game Goblin Hut placements often bait spell usage, opening windows for your actual win condition.
Late game (final minute):
Late-game Hut deployment is situational. If you’re trailing on tower health, the 15 spawned goblins might represent your best comeback opportunity, they’re free damage if your opponent has already spent their spell rotation. If you’re winning, late-game Hut placement forces a desperate defensive response or yields chip damage that closes the game.
Elixir advantage threshold:
Ideally, place the Goblin Hut only when you have an elixir advantage or when your hand is full. Deploying it while out of elixir (your opponent can immediately counterpush) is a fast-track to losing tower health. The Hut is not a defensive building: it’s an offensive threat that needs protective cover.
Counters and Defense Against Goblin Hut
Understanding how your opponents shut down the Goblin Hut is essential for realistic deck building. The Hut isn’t invincible, and some cards are built specifically to counter it.
Area of Effect Cards That Shut Down Swarms
Spells and area-of-effect units are the primary Goblin Hut killers. They clear the building and prevent future spawns in one hit.
Spell counters:
- Fireball (4 elixir): The benchmark Hut counter. Deals 580 damage at tournament standard, obliterating the Hut (960 HP) and any nearby goblins. Spell-heavy decks run Fireball specifically to answer buildings.
- Poison (4 elixir): Slower damage (4 seconds) but cheaper in elixir than Fireball for some matchups. Less reliable for instant Hut destruction but effective in control environments.
- Rocket (6 elixir): Overkill for the Hut but used in heavy control decks. One Rocket eliminates the Hut and damaging nearby troops.
- Earthquake (2 elixir): The cheapest counter. Stuns buildings for 2 seconds and damages them. Three Earthquakes destroy the Hut, but you’d need to commit multiple rotations.
- Tornado (3 elixir): Doesn’t destroy the Hut directly but pulls it together with surrounding units for Fireball combinations. Defensive utility rather than direct counter.
Troop-based counters:
- Executioner (5 elixir): Travels and damages in a large radius. One swing obliterates spawned goblins and heavily damages the Hut. Executioner-heavy decks neutralize Goblin Hut value immediately.
- Inferno Dragon (4 elixir): Ramps damage quickly. The Hut dies in seconds to Inferno Dragon’s escalating beam. Air unit also threatens your supporting troops.
- Wizard (5 elixir): Area splash and high health. Clears goblins and damages the Hut simultaneously. The Wizards Clash Royale: Master Strategies to Dominate Every Battle guide covers advanced Wizard tactics.
- Bomber (3 elixir): Cheap splash damage. While not as impactful as Executioner, Bomber still clears spawned goblins efficiently.
- Scarmy (Spear Goblins) (2 elixir): Ranged unit that attacks from distance, slowly degrading the Hut and spawned goblins without risking melee contact.
Building and Troop Counters
Beyond spells and splash units, defensive structures and direct combat units also handle the Goblin Hut.
Defensive building counters:
- Cannon (3 elixir): Not a direct Hut counter but useful against the goblins themselves. Cannon targets ground units, pulling aggro away from your tower while you rotate other defenses.
- Tesla (4 elixir): Stuns and damages goblins and the Hut. Less direct than Fireball but provides ongoing defense without committing to a single spell.
Melee troop counters:
- Mini P.E.K.K.A (4 elixir): High single-target damage. While not great against multiple goblins, Mini P.E.K.K.A destroys the Hut quickly if undefended.
- Dark Prince (4 elixir): Charges forward with shield, clearing small goblins on contact and isolating the Hut. Less common but effective.
The counter meta: In 2026’s mid-ladder environment, Fireball remains the most reliable Goblin Hut answer. This is why Goblin Hut decks need backup threats, if your entire win condition relies on the Hut, a single Fireball ends your game plan. Successful Hut players pair it with cards that thrive when spells are exhausted.
Decks stacked with Poison, Executioner, or Rocket create a harsh Goblin Hut environment. If your opponent’s deck contains multiple direct building counters, the Hut becomes a liability rather than an asset. Knowing your matchups before locking in your deck is crucial for success.
Goblin Hut In The Current Meta
The Goblin Hut’s viability shifts with balance patches and seasonal changes. Understanding its current standing helps inform deck-building decisions.
Popular Archetypes Using Goblin Hut
Even though not being meta-dominant, the Goblin Hut maintains presence in specific archetypes that have found success in 2026 ladder play and tournament formats.
Mid-ladder aggressive builds:
In mid-ladder (4,000-6,000 trophies), Goblin Hut appears frequently in budget-friendly beatdown decks. Players at this level often lack the card levels for heavy hitters like P.E.K.K.A or Mega Knight, making the Hut’s low elixir cost and spawning value more accessible. These decks typically pair the Hut with tanky melee troops like Barbarians or Hog Rider, creating split-push pressure that overwhelms mid-ladder defenses through sheer volume.
Control and cycle decks:
Control players occasionally use Goblin Hut as a value generator in decks built around Fireball, Poison, and Ice Wizard. The Hut fits because control decks thrive on long games, the passive 1,000+ chip damage from 15 spawned goblins becomes meaningful in matches where both players’ towers endure 5+ minutes. These decks are less common in high ladder but remain viable in tournament play.
Bridge spam and bait decks:
Bridge spam archetypes (cards deployed at the bridge for immediate pressure) occasionally include Goblin Hut. The 4-elixir cost and spawning utility make it compatible with other cheap, aggressive cards. Bait decks use it to bait spells, opening windows for their actual win conditions.
Data from Game8 suggests Goblin Hut maintains a 45-48% win rate in ladder play across most arenas, with higher success rates (52%+) in mid-ladder environments where opponents lack consistent spell rotation and building-specific counters. In top-ladder and tournament play, the win rate drops to 40-42%, indicating that high-level players punish Goblin Hut decks with spell efficiency and defensive discipline.
Win Rates and Competitive Viability
The Goblin Hut is not meta-defining, and recent balance patches haven’t pushed it into the competitive spotlight. But, it’s far from unviable.
Strengths in current meta:
- Elixir efficiency: 4 elixir for 15 units (if full lifetime) is mathematically strong.
- Passive pressure: The Hut forces opponents to respond or accept chip damage. This is valuable in control mirrors where tempo matters.
- Spawning synergy: Decks built around swarm mechanics gain genuine value from the Hut’s continuous unit generation.
- Budget accessibility: Lower-level players find success with the Hut because opponents at their trophy range often lack dedicated counters.
Weaknesses in current meta:
- Spell vulnerability: One Fireball (4 elixir) counters the entire Hut investment, creating unfavorable elixir trades.
- No direct damage: The Hut doesn’t defend or attack. It only spawns, requiring supporting troops to translate spawned goblins into tower damage.
- Meta opposition: Current popular archetypes (Balloon decks, Earthquake control, Inferno Dragon variants) all have natural Goblin Hut answers.
Tournament presence: Professional players occasionally include Goblin Hut in specific metagame slots, typically as a flex card in mirror matches or known opponent decks. It’s rarely the primary win condition in top-level lineups. The card lacks the burst damage of Hog Rider, the tank value of P.E.K.K.A, or the air threat of Balloon, making it a secondary utility rather than a primary threat.
If you’re climbing ladder, the Goblin Hut works best at mid-ladder (4,000-6,500 trophies) where spell-heavy decks are less common and opponents lack tight defensive discipline. In high ladder and tournament play, success requires exceptional deck synergy and player skill to overcome the card’s inherent weaknesses.
Leveling and Upgrade Priorities
Card levels in Clash Royale determine tournament standard stats and ladder performance. Leveling the Goblin Hut efficiently impacts your deck’s power and progression timeline.
Progression Path for New Players
New players operate under resource constraints. Gems, gold, and cards flow slowly, requiring strategic prioritization.
Early progression (Levels 1-7):
Focus on leveling your primary win condition cards first. If Goblin Hut is your archetype’s core, level it alongside your main threats (Hog Rider, Beatdown troops, or spell rotation). Avoid spreading resources evenly across 8 cards: concentrate on your main 4-5 cards to tournament standard.
Don’t prioritize Goblin Hut over your building counters. Having a Level 10 Goblin Hut but a Level 6 Cannon means your defenses crumble, negating the Hut’s value. Build balanced progression.
Mid progression (Levels 8-10):
Once your core cards reach competitive levels, upgrade Goblin Hut to Level 9-10. At these levels, the Hut survives most direct attacks slightly longer and spawns slightly tankier goblins. The damage improvement is incremental but meaningful in tight matchups.
Prioritize your defensive cards and spell rotation alongside the Hut. A balanced deck with all Level 10s beats a deck with one Level 11 Hut and five Level 8 cards.
Advanced progression (Levels 11+):
At Level 11+, Goblin Hut reaches maximum ladder viability. The goblins become noticeably tankier, and the building’s HP approaches max value. By this stage, you’re competing in high ladder (6,500+ trophies), where meta knowledge and matchup discipline matter more than slight level advantages.
Advanced Leveling Strategies
Experienced players optimize card progression using specific frameworks.
Slash royale and legendary tournaments:
Special events like Slash Royale (50% upgrade costs) or Legendary Tournaments (guaranteed drops) are prime windows for Goblin Hut investment. If your main deck uses the Hut, prioritize level-ups during these windows to maximize efficiency.
Focusing on a single archetype:
Instead of collecting every card, lock into 1-2 decks and level those cards aggressively. If both decks use Goblin Hut (e.g., an aggressive beatdown and a control variant), you’re doubling the Hut’s impact by maintaining level parity across different trophy ranges.
The Clash Royale Arena Strategies: guide explores arena-specific meta shifts that inform which cards to prioritize at each progression stage.
Trading and clan mate support:
Clan mates can send Goblin Hut cards once per day. Join active clans and request Goblins Hut consistently. This passive card flow accelerates leveling without requiring gems or special events.
Gem usage: Don’t rush Goblin Hut upgrades with gems unless you’re competing in time-sensitive tournaments. Gems are finite: use them strategically on cards with higher impact (your win condition, spell rotation, and primary defense). The Hut is a utility card, it’s better to invest gems in cards you’ll use constantly.
Wild card strategy: Once you unlock Wild Cards (tradeable jokers for any card), prioritize cards essential to your deck’s core function. A Goblin Hut Wild Card is valuable if the Hut is your primary spawning engine, less so if it’s a flex slot.
The broader principle: level cards that directly support your main game plan. If you’re a Beatdown player relying on Hog Rider and tanky supports, Goblin Hut leveling is moderate priority. If you’re a swarm/spawning specialist, it’s high priority. Assess your archetype’s dependencies and allocate resources accordingly.
Common Mistakes to Avoid
Even with solid strategy knowledge, players make consistent errors that undermine Goblin Hut effectiveness. Awareness of these pitfalls improves your performance immediately.
Overcommitting to Hut-only strategies:
The most common mistake is building a deck where Goblin Hut is the sole win condition. Placing too much dependence on a single card means a Fireball ends your game plan entirely. Successful Goblin Hut decks always include a secondary threat, a Hog Rider, Balloon, Inferno Dragon, or consistent spell chip damage. If your opponent answers the Hut, you still have a meaningful offense.
Placing the Hut defensively against aggressive decks:
Deploying the Goblin Hut in your back lane when facing Hog Rider or P.E.K.K.A decks is a trap. You’re sacrificing 4 elixir to summon goblins that arrive late to defense. Instead, use building counters like Cannon or Tesla against aggressive decks. Reserve Goblin Hut placement for when you have defensive control and can afford the elixir investment.
Ignoring opponent hand recognition:
If your opponent has already cycled their Fireball three times within a minute, they’re likely rotating back to Fireball soon. Placing Goblin Hut immediately after the third Fireball is punishable. Track opponent spell cycles and place the Hut only when you’re confident they’ve exhausted their immediate counter options. This requires attention and hand tracking, but it’s essential for high-level play.
Weak supporting troops:
Spawning goblins alone don’t win games. If your supporting troops are under-leveled, weak, or mismatched to the meta, the Hut becomes a lone threat that dies to focused defense. Pair the Hut with strong supporting units, ensure your Hog Rider, Musketeer, or Beatdown troops are at competitive levels and well-matched to your archetype.
Playing Hut at disadvantageous elixir timings:
Deploying Goblin Hut when you’re behind on elixir or when your opponent just cycled into a heavy unit is a classic mistake. You’re giving them a free counter-push opportunity. Discipline your Hut placement to moments when you have elixir parity or advantage. Patience beats impatience in Clash Royale.
Neglecting defensive alternatives:
Some players place Goblin Hut so frequently that they forget they have Cannon, Tesla, or other defensive buildings available. The Hut is not a defensive building, it won’t stop a Hog Rider or Giant effectively. Know when to defend with buildings versus when to establish offensive pressure with the Hut. Building selection matters as much as card usage timing.
Mis-assessing matchups:
If your deck is weak to Executioner, Inferno Dragon, or heavy Earthquake cycles, forcing Goblin Hut into those matchups is a losing proposition. Develop a realistic matchup matrix: strong matchups where you can confidently place the Hut, and weak matchups where you should minimize Hut usage and focus on defensive preservation. Top players adjust strategy based on known meta decks: you should too.
Greed in spell cycles:
Some players hoard spells hoping for the perfect multi-unit hit. If you’re holding your Fireball to hit a Goblin Hut plus goblins, but your opponent plays a second threat elsewhere, you’ve created a defending problem. Spend spells proactively when necessary rather than waiting for perfect value. The Goblin Hut forces this discipline because the goblins arrive over time, not instantly.
Conclusion
The Goblin Hut is a nuanced card that rewards disciplined players and punishes careless ones. It’s not a flashy, high-damage win condition, but its passive value, combined with proper deck construction, placement timing, and matchup awareness, makes it a legitimate ladder climber and tournament flex pick.
In 2026, the card’s strength lies in mid-ladder environments (4,000-6,500 trophies) where opponents lack consistent spell rotation and tight defensive play. At higher trophy counts and in competitive tournaments, the Hut thrives only in decks built around swarm synergy or control strategies that benefit from extended game timelines.
The core takeaway: treat Goblin Hut as a supporting utility card, not a win condition. Pair it with strong secondary threats, level it alongside your primary cards, place it only at elixir-advantaged moments, and always respect your opponent’s hand rotation. Master these principles, and you’ll extract significantly more value from the Hut than casual players.
For deeper strategic exploration, resources like GameRant and GamesRadar+ regularly publish updated meta analyses and deck breakdowns. Stay informed, adapt to seasonal balance changes, and remember: Clash Royale rewards flexibility and punishment avoidance more than rigid adherence to a single card or archetype. The Goblin Hut works best as one tool in a versatile arsenal, not the entire arsenal itself.